
This basket block came from Electric Quilt 7 and the basis for making my own quilt block.
 The photo is the rotary cutting page created for a 9-inch block. I modified the instructions some as I like a little edge room when trimming to size.
A
NUMBER OF PATCHES FOR "A"
BACKGROUND: 2 POT: 0 FLOWERS: 0
FINISHED PATCH SIZE: 2¼ x 4½
CUT SIZE: 2¾ x 5
B
NUMBER OF PATCHES FOR ”B” - needed for 2 squares, right sides together (background and pot and background and flower). For cutting, one inch is added to finished size of each patch.
BACKGROUND: 4 POT: 2 FLOWERS: 2
FINISHED SIZE: 2 ¼ x 2 ¼
CUT SIZE: 3 ¼ x 3 ¼
C
NUMBER OF PATCHES FOR ”C” - 2 squares, background and pot right sides together. For cutting, one inch is added to the finished size of each patch.
BACKGROUND: 1 POT: 1 FLOWERS: 0
FINISHED SIZE: 4 ½ x 4 ½
CUT SIZE: 5 ½ x 5 ½
D
NUMBER OF PATCHES FOR ”D”
BACKGROUND: 0 POT: 2 FLOWERS: 0
FINISHED SIZE: 2 ¼ x 2 ¼
CUT SIZE 2 ¾ x 2 ¾
 This is how the patches will look after the initial cutting. You can see the line drawn down the middle of the "B" and "C" patches. A background patch and eith er a pot or flower patch are put right sides together.
Half Square Triangle. For me, this is the best way to make HST. Just make sure that your squares are cut one-inch larger than your finished size. Draw a line corner to corner of one of the squares (shown in blue). Sew 1/4-inch from each side of the drawn line. I do a little less than the 1/4-inch.

I sew these by strip piecing, doing a bunch down one side and then turning around and sewing the other side. When completed, cut each square in half and press each open.

T his shows the squares laid out ready to sew. I've connected the squares with a dark line to show what squares to sew together. There will be two squares left over that can be used in another block.
 The squares are laid out again and ready to join the next sets. I've grouped them in the order I use to sew.
7.
 This shows the back and how I press the seam open. When you have four squares meeting in the center, there can be a lot of bulk. A good way to get rid of that is to cut into the seam on each side the of seam edge. - just beyond the edge at each side. Be careful not to cut the seam. Ir on one seam to one side. Press open the little square in the center. Press the other seam the opposite of the previous seam.
9.


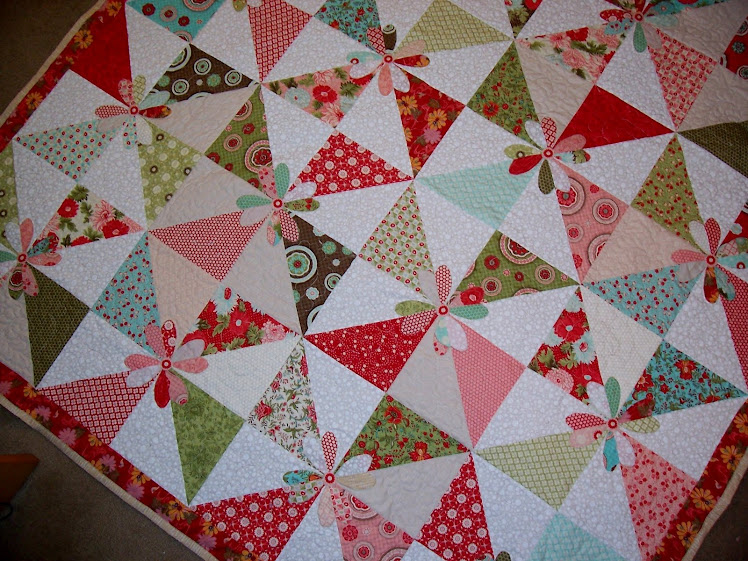
A possible quilt idea that was also done in Electric Quilt 7. This is what I plan to make. A good use the the left over HST in some of the 9-patch squares.


